How to Install a Garbage Disposal in 9 Steps
Garbage disposals are a luxury to have in any home. They’re also a relatively long-lasting appliance, with most garbage disposals lasting upwards of 12 years. If you find yourself in need of replacing a garbage disposal, we can help. Here is the basic process of garbage disposal installation.
- Disconnect the power and remove the existing unit. Make sure your disposal’s power source is completely off before doing any work. This might require shutting off the circuit feeding the disposal or simply unplugging it from the power source. Once you are sure this step is complete, remove the garbage disposal and flange assembly.
- Install the drain fitting. Install the components that will hold the disposal in place below the sink. This consists of a drain flange and mounting ring that go around the top and bottom of the sink drain opening. Seal the sink using plumber’s putty and secure the ring in place using the manufacturer’s instructions.
- Tighten the mounting ring. Tighten the three mounting screws, gradually applying even pressure. The plumber’s putty you used in step 2 should start to seep out around the drain opening when the mounting ring is tightened appropriately. Be careful not to overtighten and let all the plumber’s putty ooze out – you’ll need some of it to remain to from a proper seal.
- Connect the new disposal’s power cord. Use wire nuts and tuck the connected wires into the disposal electrical box. Replace the electrical cover plate once the wires are connected and secured.
- Mount the disposal. Line the disposal up by the top collar with the mounting ears of the sink mount assembly. Rotate the top collar with the disposal in place until the mounting ears engage or click into place with the mounting collar on the bottom of the drain fitting.
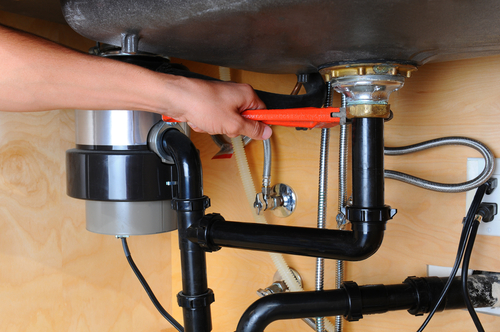
- Connect the lines. Align the disposal with the sink drain waste trap, using extension pieces or shortening existing pipes as needed. Make sure these connections are tight to prevent leaks.
- Lock the disposer into place. Tighten the cam collar on the disposal to lock the disposer to the sink mounting assembly. You should feel a “click” when this is done properly.
- Check for leaks. Slowly turn on the water to your sink and check all connection areas for leaks. Tighten any connections as necessary before you test the functionality of the disposer.
- Test functionality. Plug the disposal in and make sure the power source is turned back on. Run the motor while flushing water and typical material through the drain.
Garbage disposal installation and service
If you want to install a new garbage disposal or need help fixing an existing unit, we recommend you skip the headache of a DIY job and give us a call. At Emergency Plumbing & Solar, we offer quality plumbing services at reasonable prices in Oahu and Maui. Schedule an appointment or call us today at (808) 691-9309.